Artist Showcase

Sweet Paper Crafts: DIY Project and Party!

Artist Showcase, Craft NewsElizabeth Ramos

We've got two wonderful treats to share, a project tutorial from Mollie Greene's  new book Sweet Paper Crafts and a special party invite just for you!

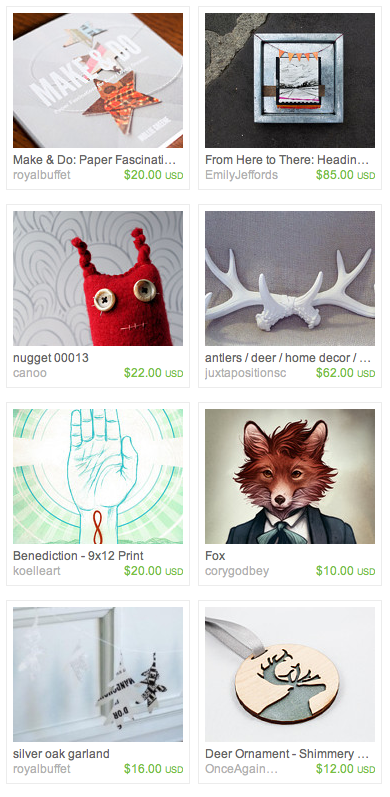
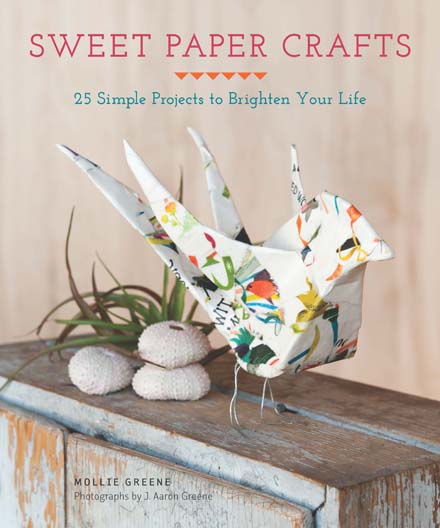
Sweet Paper Crafts, published by Chronicle Books, is a collection of 25 wonderful paper project tutorials. Mollie Greene has a fabulous knack for bringing life to bits of paper, whether through a dancing mobile or a celebratory garland flung over a doorway. These aren't your Aunt Edna's scrapbook projects, every one of Mollie's unique designs embodies her special flair for bringing life to bits of paper. Anyone can create paper art with these wonderful projects, from the eager beginner to experienced crafter. The simple, clear instructions and step-by-step photos in addition to the one-of-a-kind designs make this book a real treasure!

Mollie Greene is our personal hometown hero, we at Indie Craft Parade are total groupies. She is an artist and writer living in in Greenville, SC with her 4 adorable children and talented photographer husband, J. Aaron Greene. Her handcrafted paper lovelies have been available at past Indie Craft Parade festivals, and can be purchased through her online shop, Royal Buffet. Mollie's papercrafts have been featured in numerous online and print publications, including Martha Stewart Weddings, Design*Sponge, and Southern Living. She self-published a wonderful papercraft book in 2011, Make & Do, and has just released a new collection of paper projects, Sweet Paper Crafts, published by Chronicle Books.

We are so proud of Mollie and her continued success! She constantly inspires us with her fabulous style & aesthetic, her devotion to her family, her commitment to her work, and the incredible paper art she never fails to churn out. Mollie chronicles her everyday adventure on her blog, read along to join in the fun.

PROJECT TUTORIAL

Huge thanks to Chronicle Books and Mollie Greene for allowing us to share a project from Sweet Paper Crafts! This delightful garland is a quick and simple craft, perfect for a multitude of occasions. We love the whimsical look of stars punched from vintage magazines, but feel free to make it your own! Try parchment paper for a minimal, ethereal look, or swap out the star punch for a mini heart and craft a garland fit to make your lover swoon.

TINY STAR GARLANDfrom Sweet Paper Crafts by Mollie Greene

If you have small scraps of paper just large enough to punch with tiny shapes, save them in a box for projects such as this garland. A star is just one of the cutouts you can use to make garlands to string from room to room and beyond. The sky is the limit when you consider all the punches available.

Supplies: Scissors Ruler Thread Small star-shaped punch Papers Bowl or cup Liquid glue Glue stick (optional)

Instructions: 1. With the scissors, cut thread to the length of the garland you want to make. If you are using fine thread, the garland should be no longer than 6 to 10 ft/5.5 to 9 m to prevent knots and tangles. You can make additional garlands, if needed, and hang them end to end. Tie a loop in one end of your thread.

2. Using the star-shaped punch, punch out a number of stars from your chosen papers, letting them fall into the bowl.

3. Lay out about ten stars in a row away from you, placing them right-side down. Apply a small dot of liquid glue to the center of each star. (If using a star punch 1 in/2.5 cm or larger, you may want to cover the stars with glue stick and then with dots of liquid glue. This will keep the edges together when you apply another layer of stars in the next step.)

4. Beginning at the end of the thread with the loop, place the thread on the dot of glue on the star closest to you. Choose a star from the bowl and set it right-side up on the thread, aligning the points of the two stars. Repeat with the remaining stars in the row, spacing them as far apart or as close together as you’d like. Continue making rows of stars, dotting them with glue, and attaching the thread and the stars from the bowl until you reach the end of your garland.

5. Tie a loop at the other end of the thread and string your garland wherever you want to add a bit of whimsy.
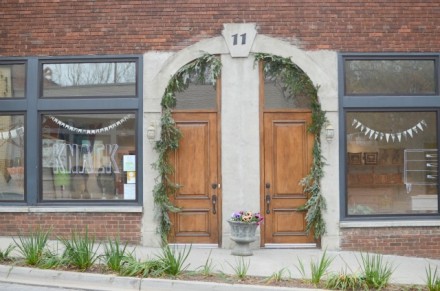
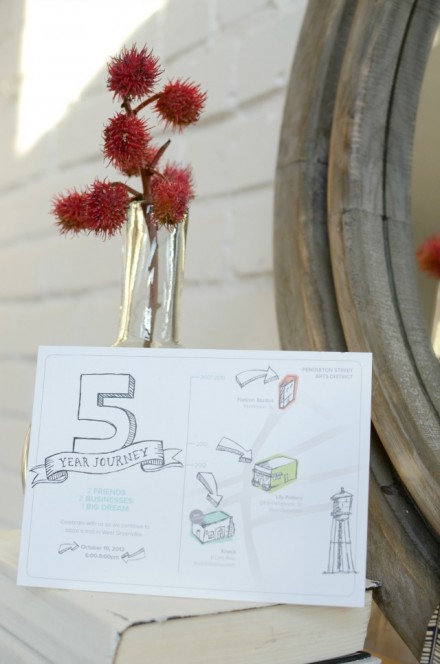
YOU'RE INVITED!

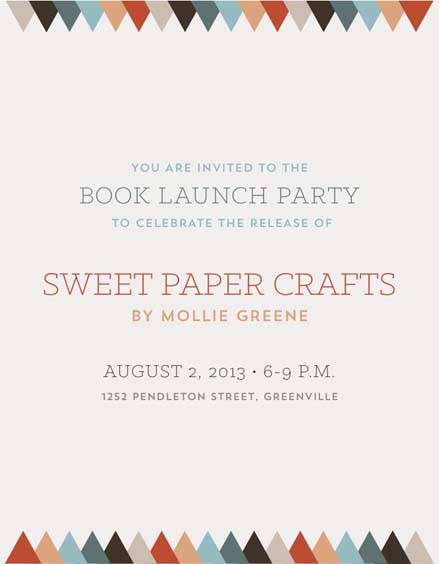
If you're in Greenville, you don't want to miss the official launch party for Sweet Paper Crafts. Everyone is invited to join the celebration! Mollie will be welcoming guests, signing books, displaying some of her latest paper crafts, eating cupcakes, and showing off her adorable baby. See above for all the details. There's a lot happening in The Village that night (First Fridays, food trucks, artist studios and galleries open), so drop by Mollie's party and then keep the fun going!

Photos by  J. Aaron Greene, used with permission from Chronicle Books.

Furniture Makeovers Blog Tour and Giveaway!

Artist Showcase, Craft NewsElizabeth Ramos
FM1

We're so excited to be the next stop on the Furniture Makovers blog tour. And we're particularly proud of the woman who made it possible---our hometown girl, Barb Blair of Knack Studios. Not only is Barb an indispensable part of the Greenville, SC arts community, but also she is a long time friend of Indie Craft Parade. Since our beginning Barb has served as both a board and jury member, lending her wisdom and advice. This past February Barb contributed to our very first Makers Summit by serving on a panel session giving advice to young businesses and creative startups. We can't say enough about how she's helped make our organization a success.

But we're here to talk about Barb's personal work:

What started as a kitchen cabinet makeover, slowly and organically grew into the full blown furniture design business that Knack is today. Barb has created a name for herself through her furniture makeovers with designs that are original, fresh, playful, and full of character.

It's been five years since Barb started her endeavor as an entrepreneur, and now, she's launched a book---a great book! With gorgeous photos, thoughtful tutorials, before and afters, helpful resources, and tons of inspiration, this is one you need to add to your collection. The best part is that Barb has something in here for everyone. Whether you're a newbie, wanting to try your hand at repurposing furniture for the first time, or an old pro, looking to expand your style, Furniture Makeovers will help you create something beautiful.

Next time you visit Greenville make a point to visit Barb's studio and retail space. Not only will you see her work for sale, but also you'll find paper, home, and kitchen goodies that you probably can't live without. Can't make it to her space? Check out Barb's online store.

 THIS GIVEAWAY IS NOW CLOSED.

GIVEAWAY!

Now for the super exciting part...we're giving away a special book & tote set, thanks to Chronicle Books. You could be the lucky recipient of a signed copy of Furniture Makeovers and accompanying tote bag...yes you! All you have to do is check out Barb's online furniture store and tell us which piece is your favorite. Leave your thoughts in the comments below. The winner will be chosen at random and contacted on Wednesday, July 24. This giveaway will ship anywhere in the USA.

Good Luck!

Photos by Barb Blair and J. Aaron Greene, used with permission from Chronicle Books.

Furniture Makeovers Launch Party

Artist Showcase, Craft News, Events, Greenville, Tips & TricksElizabeth Ramos

We'll be introducing our 2013 jury very soon, but in the meantime, we want to share and celebrate a huge accomplishment by one of our previous jury members and a longtime supporter, Barb Blair. We select each Indie Craft Parade jury member because of their involvement in the Greenville art scene as well as their contribution to the creative community at large. We think these folks have a lot to offer, so we're thrilled when they get recognized well beyond the scope of our city. This weekend, Barb will be celebrating the release of her first book, Furniture Makeovers, with a book party at her studio. The celebration starts Friday at 5pm, complete with amazing freebies for the first 100 guests in the door! Check out all the event details here.

If you're not familiar with Barb or her work, she specializes in redeeming found goods and furniture, often giving discarded pieces new life. More about the book from Chronicle:

Furniture Makeovers shows how to transform tired furniture into stunning showpieces. You’ll never look at a hand-me-down dresser the same way again! The book offers 26 easy-to-follow techniques that can be applied to all different types of pieces, from bookshelves to desks: painting, applying gold leaf, wallpapering, distressing, dip dyeing, and more. In addition to the core techniques, author and Knack Studios founder Barb Blair shares 30 beautiful before-and-after makeovers from her studio and outlines how to achieve each look. With helpful step-by-step photographs, a visual glossary explaining all the tools and materials needed, and a lovely contemporary aesthetic, Furniture Makeovers is a treasure trove of ideas and instruction for the home decorator.

Join us at Knack Studios this Friday to see Barb's work in person and celebrate with one of Greenville's many creative entrepreneurs!

Guest Tutorial by Shop-Keep (part 2)

Artist Showcase, ProjectsElizabeth Ramos

Welcome back to the upholstery tutorial from our friends at Shop-Keep!  Last time Mandy Blankenship shared the beginning of her long but rewarding journey to recovering her lovely chevron chair. If you missed part one of the story, please check it out here.

Now to continue...

7) Sewing and Stapling

All your hard work laying out fabric, thinking about which direction the motif should run, and planning how the seams will meet pays off when you begin sewing the pattern pieces together. I began by sewing the decking to the lip fabric, an odd rectangle piece of chevron that has mitered corners. Decking fabric is usually not the same as your pattern fabric but of a similar weight, so choose wisely. Once I joined the grey decking fabric to the lip, I returned to my chair frame to staple them in place. Staple the bottom of the lip to the front bottom of the chair, starting in the center and evenly distributing your fabric over the batting to the right and left, a little bit at a time. Staples should be a couple inches apart–not super close, but not really far apart. When stapling fabric, don't stretch it too tightly, or it will weaken and possibly tear. Finesse it, be gentle but firm. The fabric will go where you tell it to, but don't be harsh with it.

Sewing-&-Stapling-the-Lip-&-Decking_SM

After stapling the fabric to the bottom of the lip, pull the top of the decking fabric underneath the chair back and staple to the chair base, starting at the middle and working your way to either side. Next reach the sides of decking fabric underneath arms and staple them to sides of the chair base. You may need to cut slits near the base of chair arms so that the fabric stays smooth and doesn't fold awkwardly. Use a curved needle and upholstery thread to anchor the decking to the springs below, near where decking fabric is sewn to patterned fabric.

Now it's time to sew the welting. Join 1 1/2 inch wide strips to one another to form one really long strip of fabric the same way you would make bias tape (but ignoring all the double-folding). Then wrap the strip of fabric evenly around cording, place under cording foot on the sewing machine, and sew in place. The cording foot on the industrial machine is so dreamy to use.

Sewing-&-Stapling-Welting_SM

To make the arm covers for the Chevron Chair, I placed the welting on top of the center top strip of arm fabric with all the raw edges facing the same direction, then pinned it in place. After pinning, I basted the welting in place to keep it from moving around during sewing. If you omit basting, you MUST remove each needle before it goes under the sewing machine foot. I have broken way too many sewing machine needles by not doing this. Basting the welting in place is really the best method, looks the most tailored, and is how all the couturiers make garments of old. Sew welting to arm top fabric, then sandwich the welting in between the right side of the next piece of arm fabric to be attached, pin and baste; then sew from the side you haven't sewn on yet (this ensures the welting will be evenly placed between layers). Fit arm fabric over chair arms, remembering to smooth the batting. Staple inside arm fabric on top of where you placed the sides of the decking fabric. Before I stapled the outside arms in place, I made sure to place dust cover fabric over the outside arms in order to have a surface on which to place outside arm batting. Staple both in place, fluff batting, then cover with outside arm fabric.

Stapling-Welting-Onto-Chair-Back_SM

I used cardboard tacking strip to give a nice, sharp edge to the welting and arm fabric that reaches down the side of the chair frame past where the arm ends. Sneak cardboard tacking strip underneath the arm fabric, and carefully staple in place. Staple outside arm fabric underneath chair frame at the sides. Lastly, staple the back of the arm covers to the back of the chair frame.

8) Reuse Old or Cut New Foam

For several decades now foam has replaced traditional stuffing like horsehair in making chairs cushy to sit on. I'm really not a fan of petroleum based products (one of the many reasons I hate polyester), but it's increasingly unavoidable. You can purchase soy foam, but it's only about 20% soy-based with the rest of the mix produced like polyfoam. The healthiest, least toxic chemical-laden option is to use natural latex rubber foam made from the rubber tree. But in terms of cost-effectiveness, reusing your chair's old foam is the winner. Again, if your chair came from a smoker's house or has cat pee on it, look into buying new foam; otherwise reusing the original stuff is the cheapest and greenest option.

Sewing-Arm-Fabric_SM

I reused all my old foam and batting for the Chevron Chair cushion, arms, and inside back. If you purchase new foam, cut it into the same shapes as the old, using an electric turkey carver. Sounds crazy, but it works. Staple it in place, and cover with batting.

Place-Batting-Over-Arms_SM

9) Sewing the Deck Cushion

Sewing the deck cushion is just like making the arm covers. Pin and baste welting to the top and bottom pieces first, then sew in place. Reuse your old zipper, if possible, for the middle piece of the cushion cover. Sew the zipper to the middle piece, then pin and baste the middle piece to the top and bottom of cover. Remember to sandwich the welting between right sides of the cushion cover, this time sewing from the side you haven't done yet. With the cushion foam wrapped in batting, stuff it into the new cushion cover and zip closed. You can sew a simple muslin cover to go over the foam and batting first, and then put that inside the upholstery fabric cover, but that is an extra step you may not want to take. I didn't.

10) The Inside Back

Completing the inside back of the chair is one of the easiest parts to do because it requires no sewing. Place chevron fabric right side up (because you marked which direction that was) over inside back foam and batting, making sure the batting looks smooth. Staple in place at top and bottom first (on the backside of the frame), working from the center to the right and left. Distribute taut fabric evenly. Then draw the fabric through the left side and right side and staple the same way. This was when I noticed where all the change from your pockets disappears to over the years. You can reach your hand pretty far back between the decking fabric and inside back fabric.

Fitting-Arm-Fabric-over-Arms_SM

11) The Outside Back

You're almost done! Staple dust cover fabric over the outside back of the chair frame, the same way you did for the outside arms, and place batting over it. Staple the batting in place and fluff it over the staples. Next, take the remaining welting and staple it, raw edges facing inward, around the outside back of the chair. I stapled welting on the top and sides but not the bottom of the chair back because I wanted the bottom of the chair to look the same on all four sides.

How do you staple the outside back cover of the chair, you ask? You don't. This is where you employ flexible metal tacking strip. It's tricky to use and will definitely bite you, but magically works. Staple the metal tacking strip inside the welting, with claws poking outward at you, but in the center of the chair. You're going to bend these claws toward the welting, grabbing the outside back of the upholstery fabric and enclosing the back of the chair. Bend the claws toward welting with your fingers, then pound completely closed with a rubber mallet.

After finagling the flexible metal tacking strip, the only part of chevron left to staple is the bottom. Work from the center to either side of the bottom of the chair frame like you have before.

12) The Dust Cover

¡Finalmente! You're really almost finished! Carefully turning your chair upside down on a clean surface (you don't want to get the fabric dirty), place dust cover fabric over the bottom of the chair. Tuck raw edges in and staple in place to keep critters out.

13) Reattach Chair Legs

Lastly, importantly, reattach your chair legs by screwing them in place through the dust cover fabric. Dust cover fabric is not super strong and easily tears. But that's ok, because you need to have chair legs go through it. Once the legs are secure, turn your chair over, and sit in it. Revel in a job well done.

You can use these instructions as a supplement to a book about upholstery, such as Furniture Upholstery by Sunset Books. I also HIGHLY recommend taking an upholstery class at your local community college. Hands on experience with a teacher at an affordable price + whatever you spend on fabric and tools you'll keep. Happy upholstering!

Guest Tutorial by Shop-Keep (part 1)

Artist Showcase, ProjectsElizabeth Ramos

We love living in such a creative community (as we've said a million times). We learn so much from the makers around us...and sometimes we even get to share their talents and experience with you, our followers. Today, I'm pleased to share with you the talents of Joshua and Mandy Blankenship, creators of Shop-Keep. Shop-Keep is a wonderful jack-of-all-trades in the creative scene. The Blankenships both source and craft all manner of creative goods. Whether it's handmade paper cards or refinished vintage furniture, Shop-Keep is your one stop shop for something unique and wonderful.

Mandy has a particular knack for upholstery projects, and she has graciously shared with us the story of how she turned a frumpy old chair into an updated, reupholstered beauty. This is a long story/tutorial, but Mandy has done a great job simply explaining the involved steps of the reupholstering journey. I've always been fascinated with this process, so it's great to have a detailed step-by-step.

So take it away, Mandy!

The-Chevron-Chair_SM

If you don't like details, maybe reupholstery is not for you. This is not the blog post to tell you how to hot-glue fabric to your dining chairs. I am not that girl. I dream of making things--all kinds of things--and doing it the proper way, the way the professionals do.

When my husband and I starting collecting vintage furniture, we collected more than our fair share of chairs. Often wooden dining chairs, or aluminum Goodform and Steel Case office types; but we couldn't turn down the occasional comfy side chair–envisioning a graphic, modern fabric in place of that dingy corduroy or yucky tweed. Around 30 chairs into our collection, Joshua and I decided it was finally time to sign up for the upholstery class at the local community college. It would cost more than $170 per chair to hire someone to redo them, so we figured it was money well spent even if we decided we hated the process.

The 8 week class turned into 18 weeks, attending extra classes once or twice a week to finish our little preciouses (caveat: we could have finished the chairs in MUCH less than 8 weeks if classes had met more often). Joshua became increasingly frustrated with the detailed parts of the process, but he discovered he's exceptionally adept at tear-down (a tight grip comes in handy). I enjoyed it all but needed some extra help with staple-removing and de-nailing things. We're a good match.

What follows is a rough overview of The Making of The Chevron Chair. Once upon a time it was The Comfortable But Aesthetically Needy Corduroy Chair. To create the Chevron Chair, I made some design decisions like removing the skirt to expose those lovely turned legs. You need basic sewing skills to reupholster furniture. An industrial walking-foot machine and upholstery staple gun with air-compressor are also really necessary. I'm not saying you can't do this on a home sewing machine or with a manual staple gun, but your wits will be tested and your hands will be bruised if you go that route.

SUPPLIES

Claw tool: a forked-end tool used to remove tacks and staples Hammer Pliers Masking tape Rubber mallet (white is best, but you can cover a black one with fabric)/ Curved upholstery needles Straight pins Sewing needle (for basting) Seam ripper Flexible tape measure Yardstick / straightedge Spring twine: also called laidcord, a waxed jute twine used to tie springs together Burlap Fabric shears: sharp scissors used for cutting fabric only Flexible metal tacking strip Cardboard tacking strip Tailor's chalk Dust mask Goggles Leather work gloves Upholstery fabric (common yardage for different chairs) *Foam *Batting Dust cover fabric Cording *Zipper Upholstery weight thread

*Can be reused from old chair upholstery

Study-the-Chair-(on-the-right)_SM

1) Studying the Chair

This is an essential first step to reupholstering any piece of furniture. Most upholstered chairs have an inside back, an outside back, inside arms, outside arms, deck, lip, and some have wings, welting, and cushions. If you can't identify where all these pieces are, you will not end up with a fully reupholstered chair, and that will be sad. Make a simple diagram of your chair labeling each part. Place masking tape on each section of your chair and label appropriately: inside left arm, outside left arm, inside right arm, outside right arm, etc. Label your chair, left and right, as you face it, not as if you were sitting in it. Do not skip this step, or you will be confused later on.

Tear-Down-1_SM
Tear-Down-2_SM

2) Tear-Down

Remove chair legs, and place your chair on a sturdy surface for the duration of the reupholstery project. Our chair stands were about 2 feet high and large enough to hold each person's piece with a few inches to spare on each side. Deconstruct your chair with care and gusto, wearing a mask, goggles, and work gloves. Old dust, splinters, and pet hair fly during this phase. Remove staples and decorative nails completely, but do not rip or cut the old fabric. You need all the old fabric to use as a pattern for the new. Also save the batting and foam under the old fabric if possible. Throw away damaged, bug-infested, or smelly chair innards. A smoker's chair stuffing will always smell like the smoker who nestled in it. Rip all the seams of the old fabric and separate the various pieces. Double-check to make sure each piece is labeled before you rip the seams. Consider using the <a href="http://en.wikipedia.org/wiki/Nasal_irrigation">neti pot</a> after a tear-down session.

Repair-Springs_SM

3) Repair Springs, Webbing, and Frame

Some springs are zig-zaggy and others are classically coiled. Every coil is joined by spring twine to create a firm, bouncy base on which to rest your tush. The BEST chairs, we learned, have eight-way hand-tied coils. Our teacher could not say enough good things about eight-way hand-ties. If there is an upholstery hall-of-fame, I wonder if people reminisce about Sir So-And-So's eight-way hand-ties like legends about Helen of Troy's beauty or the Hanging Gardens of Babylon. I hope so.

Make sure your coils are properly tied together with spring twine, that frayed webbing is replaced with new, and that any defects on the wood frame of your chair have been dealt with. Now is the time to completely remove stubborn staples or hammer in broken ones, yank out unnecessary nails or pound ones that are loosely holding the frame together. Make the frame of your chair completely stable and ready to carry the weight of the most robust visiting relative. Once you've repaired all the essentials, lay burlap over bottom and back springs, tuck raw edges under, and staple in place.

Burlap-Over-Springs_SM

4) DO NOT WASH YOUR NEW UPHOLSTERY FABRIC

Learn from my mistakes. I'm used to sewing quilts and garments, and pre-shrinking fabric is a must when you expect to launder anything regularly. Upholstery fabric, however, comes with a sort of protective coat on top, a sheen to repel moisture or food spills. You can, of course, choose a fabric that's not strictly for upholstery, but even those come off the bolt with a finished look. Just remember, you are not going to launder your chair. You will spot-clean it. If you desperately want to pre-shrink the fabric, for goodness sake check the washing instructions for what you bought. Luckily washing the chevron fabric was no big deal, though completely unnecessary. Washing the turquoise fabric for Joshua's chair was a big mistake, as you can see. Fabric.com has wonderful customer service and sent me new fabric at no cost.

Do-Not-Wash-Your-Fabric-2_SM

5) The Old Upholstery Fabric Is Your Map

Lay out the old fabric on top of the new and use it as a pattern, tracing its shape onto the new fabric with chalk. Make sure that each peace of new fabric you cut faces the same direction, as light will reflect differently on upside-down fabric grain vs. right-side up fabric grain. Decide whether to "railroad" your fabric or leave it vertical, where the straight-of-grain runs vertical (parallel to selvedge edges) and the cross-grain is perpendicular to the straight of grain. Railroading fabric is turning the bolt sideways so that it runs left to right and will shift the motif completely. This works for some patterns and definitely not for others. If you're reupholstering two chairs to match, make note of whether or not you railroad the fabric. You don't want to end up with one vertical plaid and another horizontal plaid. Label each new fabric piece with masking tape to show which direction is up.

The Old Upholstery Fabric Is Your Map_SM

Look at the pattern motif of the new fabric, and plan where the pattern repeats will meet at the seams before you trace with chalk. Seam allowances are included in the old fabric piece after you rip out the seams. Notice if that allowance is 1/4 or 1/2 inch and take that into account when deciding where to place seams. My chevron fabric is made of a series of Vs, and I had to think about how those Vs flowed from section to section (from the lip of the chair to the front boxing of deck cushion to the top of deck cushion, etc.). If they can't match perfectly, at least make it look purposeful. I chose to center the chevrons on the lip of the chair first and planned my way up the chair from that point. The top of the chair arms don't match the inside back perfectly but are positioned in a pleasing way. The sides and back just continue the chevron pattern in a way that makes sense. Cut new fabric along traced chalk lines.

Welting, sometimes called piping on garments or smaller projects, is fabric sewn around a cord and used as decorative edging. The Chevron Chair has welting on the deck cushion, down the arms, and around the back of the chair. Fabric used for welting is often cut on the bias, but for my chair I cut 1 1/2 inch strips vertically down the chevron motif so the welting would look kind of like a candy cane. Measure the length of welting on the old fabric to decide how much you need for the new upholstery, or just measure parts on the frame where you think it would look good. Be generous in your measurements. I used less welting with the new fabric than the chair previously had, but I still needed some extra to sew it all together. Use chalk to trace 1 1/2 inch strips as long as you can on the new fabric, and cut along traced lines.

Batting-Isn't-Just-for-Quilting_SM

6) Batting Isn't Just for Quilting

Batting is commonly thought of as the fluffy, scrumptious layer between the top and bottom of a quilt, but it's a must for upholstery too. Every place your chair will be covered with fabric, it needs to be covered in foam and/or batting. Any upholstery fabric that rubs agains raw wood will tear over time and ruin all your hard work, plus it's not comfy to sit on. Before fitting sewn fabric over top of chair arms, place batting over arm foam and raw edges of wood, staple it in place, and fluff batting over staples. Fluffing the batting makes sure that you won't see any divots in the fabric after you place it on top of the batting. If your batting is smooth, your fabric will lay smoothly; if your batting is lumpy, your fabric will look lumpy.

To be continued...

Holiday Fair Gift Guides Part 2

Artist Showcase, General InfoElizabeth Ramos

We're back with more handmade suggestions for all of those people on your Christmas list.

FOR THE COLLECTOR:

For those who are always looking to add to their gallery wall.

il_570xN.292093030

Benediction print by Chris Koelle

il_fullxfull.377265425_m7h3

Operatic Dragon print by Cory Godbey

FestivalinthePark5

Collage art by Emily Jeffords

il_fullxfull.374773290_2u03

Felt cactus garden from Once Again Sam

GREAT STOCKING STUFFERS:

Need just a little something for a party, gift exchange, or stocking? These artists will have items under $10.00 at their booths.

6148807175_b64d324a85_b

Assorted Bobbies from 17 Dove Street

Letterpress greeting cards from Quill and Arrow Press

Screen shot 2012-11-29 at 12.14.05 PM

Hand spun yarn skeins from Merciful Hearts

6148806385_9b7073089e_b

Locally made soaps and scrubs from The Herb Garden

Screen shot 2012-11-29 at 12.00.17 PM

Animal magnets from Juxtaposition

Two more days! See you Saturday!

Holiday Fair Gift Guides Part 1

Artist Showcase, General InfoElizabeth Ramos

We're just days away from the Holiday Fair, and we can hardly hold in our excitement! We've made our shopping lists, and I want to share these ideas with you. Here are some ideas for all those special people in your life.

FOR HIM:

Know a creative guy or someone who just appreciates the cool things in life? Be sure to visit these vendors at the Holiday Fair to pick up a gift that will leave you looking awesome!

For the socially conscious guy with good taste: handprinted Toms shoes by Matt Butler.

For the guy who loves jeans: Locally printed and designed tees by Parachute Clothing.

CC_8024_1024x1024

For the Perfect Gentleman: hand sewn ties from The Cordial Churchman.

For the Man Cave: prints from Shed Labs.

For the Cycle-phile: prints by Matt Butler.

For Her:

All girls love jewelry, but not just any jewelry...something that sets them apart from the rest. We'll have quite the selection at the Holiday Fair. Plus other awesome fineries for the chicas you know.

For the bibliophile: Leather wrap bracelet from the found'ling.

For the nature girl: animal rings from Audrey Laine.

For the Explorer/Adventurer: felt fungi necklaces from Heather Keew.

For the Accessorizer: hand woven scarves from Teri Goddard.

For the Coffee/Tea Connoisseur: hand thrown and carved mugs from Rachel Feece.

Who's on your list? I guarantee we'll have something for everyone! Stay tuned for more guides.

String Art Demo from Dapper Ink

Artist Showcase, ProjectsElizabeth Ramos

A few months ago, we shared our love of string art---that is incorporating string into an existing piece, or creating art entirely out of string. So we were pretty excited when our friends at Dapper Ink (a local screen print and design shop here in Greenville) decided to do a new installation that featured string art. Over the past years, Dapper Ink has hosted installations created by local artists. With the addition of letterpress printing to their shop, however, they wanted to do something that showed off their love for all things print, and the Long Live Print plans began. So check out their behind the scenes video. They've proved that string art (though time consuming) can be an accessible form of art. Maybe this will even inspire you to try it yourself.

http://vimeo.com/53853809

If you're interested in making some string art of your own, Jen from Dapper Ink has shared a few tips:

1) Rather than just going at the project with nails and string, have a plan. We actually printed our design on a banner printer, attached it to the plywood and used that to guide our nail holes. The paper is also great because it keeps your wood underneath clean. Our hands got REALLY messy because of the oxidation on the nails. Chances are you might not have access to a banner printer. No problem...as long as you're not doing a huge installation, print outs from home should work fine.

2) Recruit friends to help you put in the nails. It WILL take you longer than you think.

3) Look at string art inspiration online to give you an idea of how you want to wrap your string, that is, how you want the pattern to look. Do you want it to be very uniform? Or is it ok to be messy and random? Either choice can be fine, but it's difficult to change your tactics once you've started to fill in the nails with string.

4) Use one continuous strand of string or yarn for as long as you can to maintain an even look to the design. However, tie off the ends often. If it starts to unravel, you could lose all of your work to your last tie off point.

Upcycling Vintage Crates and Boxes from Maiedae

Artist Showcase, ProjectsElizabeth Ramos

We've had such an incredible response to Emily's DIY Chalkboard Lettering a couple of weeks ago, I couldn't wait to put up a new guest blog post from another talented lady. Today I'm introducing Savannah Wallace from Maiedae--an artistic, fashion, and lifestyle blogger. Two years ago Savannah and her business partner Jenny participated in Indie Craft Parade as jewelry artists, and I've been mesmerized with their work ever since. Besides her work in jewelry, Savannah is also a graphic designer and photographer. I've been pestering Savannah to do a guest blog post, and fortunately, her busy schedule has allowed her to share this adorable tutorial with us. Thank you, Savannah!

** ** ** ** ** ** ** ** ** ** ** ** ** ** ** ** ** ** ** ** ** ** ** ** ** ** ** ** ** ** ** ** ** ** ** ** ** ** **

DIY: UPCYCLING VINTAGE CRATES & BOXES

Hello friends! Savannah from 

Maiedae

 here to share with you a simple DIY and tips on up-cycling your vintage crates and boxes. Last year I spent some treasure hunting time at local antique stores in search for wooden finds. I found old coca-cola crates, small wooden boxes and a few larger crates. I built up my little collection and have found over the past year that they've served for many uses! I used them as display pieces for my handmades at a craft show, stacked them together to make night stands for my husband's and my pallet bed, put plants on them outside and used them for pretty storage. Today's DIY shows how I used simple elements to up-cycle one of my favorite wooden boxes as a "free for all" things box.

SUPPLIES

* Multi-surface paint - I used Martha Stewart's metallic gold paint.

* Stencil or silk screen - I found a great selection of stencil pieces and some beautiful Martha Stewart silk screen letters at Michael's. You can find things like this at your local craft shop.

* Dresser knobs.

STEP BY STEP

1. Using a drill, make holes into your wooden piece for knobs or hooks. Use these to hang your keys, add a little visual interest or hang other treasured items from.

2. Paint the inside of your crate with a color of your choice to give your box/crate dimension and a little pop or color or metallic flair.

3. Stencil a word or pattern on your box to match its use.

IMG_2721small
IMG_2721small
IMG_2722

Just by getting a little creative you can easily up-cycle any of your favorite wooden antiqued pieces and give it a little extra charm! Try using your favorite colors, fun stencil patterns and trying it out in different places in your home. I love that my "things" box can be used for mail, main floor nick-nacks, make-up and bathroom supplies. So many uses and way more attractive than a plastic bin.

Thanks for having me! Stay warm.

-Savannah

DIY Chalkboard Lettering with Emily Jeffords

Artist Showcase, ProjectsElizabeth Ramos

We've said this before, but one of the best things about Indie Craft Parade is getting to know the awesome people in the maker community. These connections can provide new friendships, networking connections, business opportunities, and they always supply creative inspiration. For this guest post, we called in one of the amazing connections we've made---the ever lovely Emily Jeffords

We asked Emily to supply a project for us...and she did something awesome: DIY CHALKBOARD LETTERING. This is an amazing idea. Who doesn't love beautifully hand lettered designs? And now you can do it yourself!

So without further ado, take it away, Emily!

** ** ** ** ** ** ** ** ** ** ** ** ** ** ** ** ** ** ** ** ** ** ** ** ** ** ** ** ** ** ** ** ** ** ** ** ** ** **

Hello!  I’m so happy to be guest blogging for one of my favorite groups, Indie Craft Parade!  I’m sure you have noticed the growing chalkboard lettering craze sweeping America and Europe right now.  It’s pretty awesome.  Well, it’s awesome if you have freakishly amazing handwriting (which I don’t!)  I can barely write an address on an envelope with grace. Sadly, I’m going to have to leave the hand-lettering to the likes of Dana Tanamachi and Molly Jaques.

The good news: those of us who aren’t Dana Tanamachi can still have amazing chalkboards with freakishly amazing typography and precision (we just need a teensy bit of help from the computer….  Shhh.)

Oh, and lefties, you’re in luck.  Because you don’t have to do one bit of writing, you can work from right to left!  You should have seen me working on this baby upside down, sideways, and backwards!

This chalkboard DIY is so stylish, so trendy, and so, so easy.

Things I leaned during this DIY:

1. Chalkboard spray paint is a total joke.  Just use flat black paint and mix in a tiny bit of clear gesso or unsanded tile grout.  I didn’t try the paint can variety.  Maybe it’s amazing? 2. Really, really, really cover the paper with chalk.  It will save you so much time in the long run. 3. You might want to do a few words with larger text…  not going to lie, this took quite a while because my text was so small (and I’m a bit of a perfectionist.) 4. A small paintbrush + water is like a magic eraser.

I hope this inspires you to have fun creating something amazing and original.

The Lamp Post Guild on Kickstarter

Artist Showcase, Craft NewsElizabeth Ramos

We love sharing with our community the newest resources and trends in the world of making, which is why I nearly flipped when I saw this new Kickstarter project called The Lamp Post Guild. Three professional illustrators from Greenville (2 of which have been Indie Craft Parade vendors) have created an online course to teach people how to turn their passion of art/illustration into a career.

Statement of purpose from The Lamp Post Guild:

Every kid drew pictures until someone told them they couldn’t.Millions of people wanted to become artists when they grew up,but they were told that being an artist is not a "real job."Only a few of them will actually make it as professional artists.It doesn't have to end this way.

We want to make this story end differently for these aspiring illustrators and artists by teaching online courses that will help them improve their craft and earn a living doing what they love.

This presentation is done beautifully, and if you have people in your life who would benefit from taking these classes, you should seriously consider supporting!

Knack Studio Grand Opening This Weekend!

Artist Showcase, Craft NewsElizabeth Ramos

We love this time of year in the arts and craft world. It seems like between now and the new year, every week there is a show, a market, a gallery crawl, or (as in this announcement) a studio grand opening! We've got so many events to tell you about in the coming weeks, so make sure you're checking back with us. Today I want to share an upcoming event for the creative genius that is Knack Studio--Barb Blair. She's been a long time friend of Indie Craft Parade, serving as an exhibitor as well as a jury and board member. Not to mention, she's a foundational piece of the arts scene here in Greenville. Barb specializes in remaking antique furniture, often finding beauty in pieces long overlooked. Not to mention she has an impeccable decorative sense which means she has a wonderfully curated line of "found goodness" for sale. Over the past few months she's been renovating a new studio that has its Grand Opening this Friday night! We've had a sneak peek into the new venue, and let us tell you--it's worth going to see.

The new studio opening will be in conjunction with another Indie Craft Parade friend, Lily Pottery. To check out the details, head on over to Barb's blog. We can't wait to go!

men's Gift guide for the 2012 Indie Craft Parade

Artist ShowcaseElizabeth Ramos

As we are rapidly approaching the big event, I've been giving you sneak peeks at the artists' work who will be at our market. So far we've focused on individual artists, but today (and next week) I want to do something a little different. I've put together a gift guide for you. It's not too early to be thinking of Christmas gifts, and if you don't find the perfect something for everyone on your list at Indie Craft Parade, good luck finding it elsewhere. Indie Craft Parade truly has something for everyone--even the men in your life. People often mistakenly think of art markets and festivals as being for women. And while, yes, many of our vendors and shoppers are women, that doesn't mean for a second that we don't have some really great things for guys.

Check out these awesome items below. The dapper gents in your life will certainly be happy to receive them.

1. The Maker Tee from Parachute Clothing

2. Gentle Giant Tee from Fuzzy Ink

3. Etched Pint Glass from Phoenix Fire Studios

4. Handmade Bow Ties from The Cordial Churchman

5. Block Printed Toms Shoes from Matt Butler

6. Travel Journal from Useful Books

7. Screenprinted Poster from Shed Labs

8. The Skinny Jean from Billiam Jeans

Featured Artist: Heather Keew

Artist ShowcaseElizabeth Ramos

Time for another sneak peek! This time from one of our fiber artists, Heather Keew. Heather specializes in creating nature inspired pieces from felt and stitching. I love her work for its creative twist on plants, trees, and landscapes. Her pieces have such an ethereal quality to them, and the whimsy of it all just makes me want to collect each piece. (I am lucky enough to already own one.) Come see Heather's work in person! You'll love it as much as I do.

Featured Artist: Hawks and Doves

Artist ShowcaseElizabeth Ramos

One of the great themes of the indie craft movement is repurposing. Whether the objects be vintage finds or things headed for the trash, indie artists can find a beautiful use for them. Jessica Reed, the artist behind the Hawks and Doves shop, does just that. She finds vintage feed sacks and turns them into these fabulous pillows. Every feed sack has a story, and Jessica preserves that story through her amazing work. I can't wait to see these in person!

il_fullxfull.352852568_gwhy

Featured Artist: Emily Jeffords

Artist ShowcaseElizabeth Ramos

Emily Jeffords, one of our 2-D participants, has her hands full as a wife, mother, and full time artist/designer. But she still manages to produce really beautiful, fresh work inspired by life's travel and experiences. Adept in many mediums, Emily will be bringing paintings, collages, and unique jewelry pieces to Indie Craft Parade...in just a couple of weeks! I can't wait to see these in person.

Emily also has a fantastic blog. If you want to know more about her work and inspiration, check out Beautiful Hello.

observatory

Featured Artist: Spectrum Jewelry

Artist ShowcaseElizabeth Ramos

Julia Riffel has been a vendor at Indie Craft Parade in previous years. But she's bringing a brand new line of jewelry to this year's event. Within the past few months, Julia began playing wood shapes, and soon after, Spectrum Jewelry came into existence. Her beautiful geometric inspired pieces are sure to make a stand out presence at Indie Craft Parade. To check out more of Julia's work, see her blog: Life without Television.

tumblr_m7f7tvCUNh1r6lrg4

Featured Artist: Jeanette Zeis Ceramics

Artist ShowcaseElizabeth Ramos

I'm so happy to be sharing the work of Jeanette Zeis Ceramics with you today! Her work is amazing, and I'm so excited to add this brand new vendor to Indie Craft Parade this year. Jeanette has created a fresh line of functional ceramics from her Atlanta based studio. These whimsical pieces from cake stands to berry bowls to salt cellars and more are going could look incredible in any kitchen. To see more check out her Etsy shop. She also does custom work such as personalized items and registries. Can't wait to see these in person!

il_fullxfull.313904582
il_fullxfull.196054210